Categories
Categories
- Home
- Magnetic Photo Booth Strip Frame Insertion Tool
Magnetic Photo Booth Strip Frame Insertion Tool
Photos just slide into our Magnetic Photo Booth Strip Frames. If you are printing your photos on very thin paper such as 20 pound bond copier paper, the photo may be difficult to slide in as it can bend or wrinkle. To make inserting thin photos easier, Mr. Lytle has designed his special strip photo inserter tool. Just follow the directions below to make this a simple and easy process.
One free insertion tool will be included with every magnetic photo booth strip frame order. The insertion tool can be used over and over again. Order more as needed at $1 each. Four sizes of insertion tools are available; 1½-inch, 2-inch, 2¼-inch and 2½-inch wide photos. Be sure to order the right size for your frames. Don’t forget to order enough tools so everyone will be able to enjoy their photos right away. Custom sizes are also available for the same price.
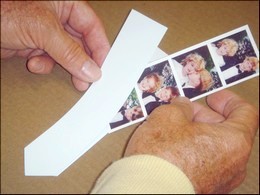
Place the photo between the front and the back of the inserter with just about an inch protruding from the top. Center the photo in the inserter so the same amount of photo extends beyond the right and left sides.
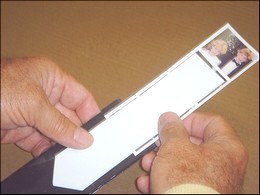
Holding the frame lightly in your left hand, start inserting the tool and photo into the frame. Do not pinch the frame. Pinching the frame will stop the photo from going any further into the frame.
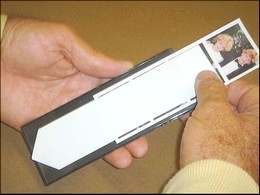
Holding the frame lightly in the left hand as shown, continue to feed the tool and the photo into the frame until the inserter tool’s bottom tip extends out of the bottom of the frame.
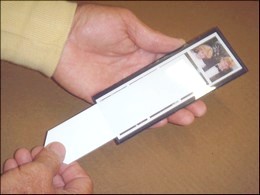
Continue to hold the frame lightly in the left hand and pull the photo and the inserter with the right hand all the way into the frame until the photo shows equal background border at the top and bottom of the frame.
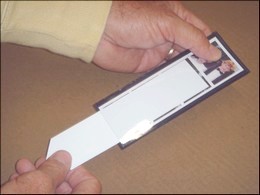
At this stage, you can move the photo around pretty easily in the frame with the inserter tool. When you have the photo positioned the way you like it with equal background showing on all four sides of the photo in the frame, just pinch the frame and photo top with your left hand and pull the inserter tool the rest of the way out of the frame. This will leave the photo perfectly positioned in the frame and it will not fall out when displayed magnetically on a steel surface or a wall painted with our new Magically Magnetic Paint.
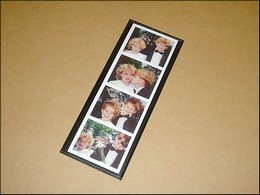
The finished product, easy, don't you agree?...
 Loading... Please wait...