Categories
Categories
- Home
- Wood Trimmed Panel for Magnetic Paint Wall
Wood Trimmed Panel for Magnetic Paint Wall
Make a wood trimmed display panel for a wall treated with magnetic paint.
 Decide on the size of area you want to paint with magnetic paint. With a level, outline the area lightly in pencil, making sure it is level, plumb and square. Tape the edges with painter's low tack adhesive tape. Paint as many coats as you like of the magnetic paint and then a colored finish coat.
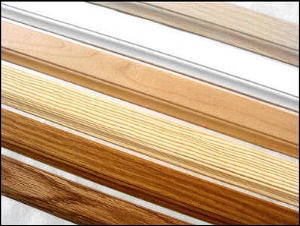 Now you are ready to add a beautiful finished look by making a frame for the border of all or part of the magnetically attractive area. This can be easily accomplished with a couple lengths of the new artificial wood trim that is available in lumberyards and building supply stores. It is made from lightweight plastics and looks just like real wood. This trim comes in many colors and different types of wood, that appear stained, varnished and ready to use. Magnetic tape in 30 mil or thicker is strong enough to hold this trim in place on a wall painted with our magnetic paint.
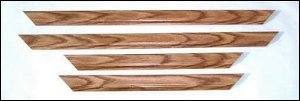 Both ends of each piece of trim will need to be cut at a 45 degree angle. Cut two pieces of trim the same as the outside measurement of the horizontal length of your magnetic area and two more pieces the same measurement as the outside vertical height of the magnetically attractive area. Make your measurements from long end to long end of the angle cuts. Decide which edge will be the inside edge of the trim. That side will be the side that gets the shorter end of each 45 degree angle cut. The long ends will be on the outside edge and the short ends will be on the inside. This part can be confusing, so think it through carefully and then start cutting. See the photo on the left. Make a sketch with measurements to aid you in your planning.
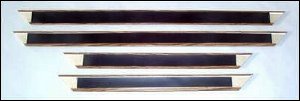 You can cut a 45 degree angle easily with a hand or power operated miter saw. If you don't have a miter saw, lumberyards often have this equipment and can do the cutting for you. Just give them your sketch and your measurements. Lastly, cut pieces of magnetic tape to adhere to the backs of the trim pieces and place them in position on the magnetic wall. No glue is necessary. Just join the corners by mounting them in the correct position. The pieces of magnetic trim can be moved and adjusted easily and will stay in position when finished.
There are many different end profiles available in this artificial wood trim. The one you chose should be flat on the back. When the magnet is applied, it must make solid contact with the magnetically attractive surface, or it will not hold.
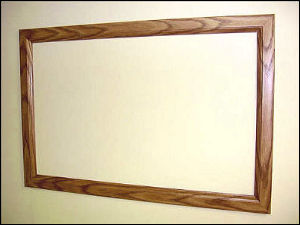 One eight foot strip of trim measuring 1-1/4" wide, is long enough to make a rectangular frame measuring about 16 by 24 inches. If the trim is narrower, it will make a frame as large as 18 by 24 inches. Frames as large as 4 by 8 feet and larger, can be made in a similar fashion by using three or more 8 feet lengths of trim. These frames add a wonderful decorative finishing touch and are very inexpensive and easy to make. The trim strips usually cost only about $4.00 per 8 foot strip and our magnetic tape is also very inexpensive. Like our magnetic frames, these border strip-frames can be moved and rearranged over and over easily. You'll love arranging and rearranging your photo displays in them.
 Loading... Please wait...